How to Test a Capacitor: Easy Guide for Beginners
Capacitors are one of the most important components in electronics. They store and release electrical energy, helping circuits function properly. But what if a capacitor stops working? How do you check if it’s good or bad?
Don’t worry! In this simple guide, we’ll walk you through different methods to test a capacitor using easy steps.
🔍 What You Need to Know Before Testing
Before testing a capacitor, here are some key points to remember:
✅ Safety First! Always discharge the capacitor before testing to avoid electric shocks.
✅ Capacitors Have Polarity (Sometimes) – Electrolytic capacitors have a positive (+) and negative (-) terminal, while ceramic and film capacitors don’t.
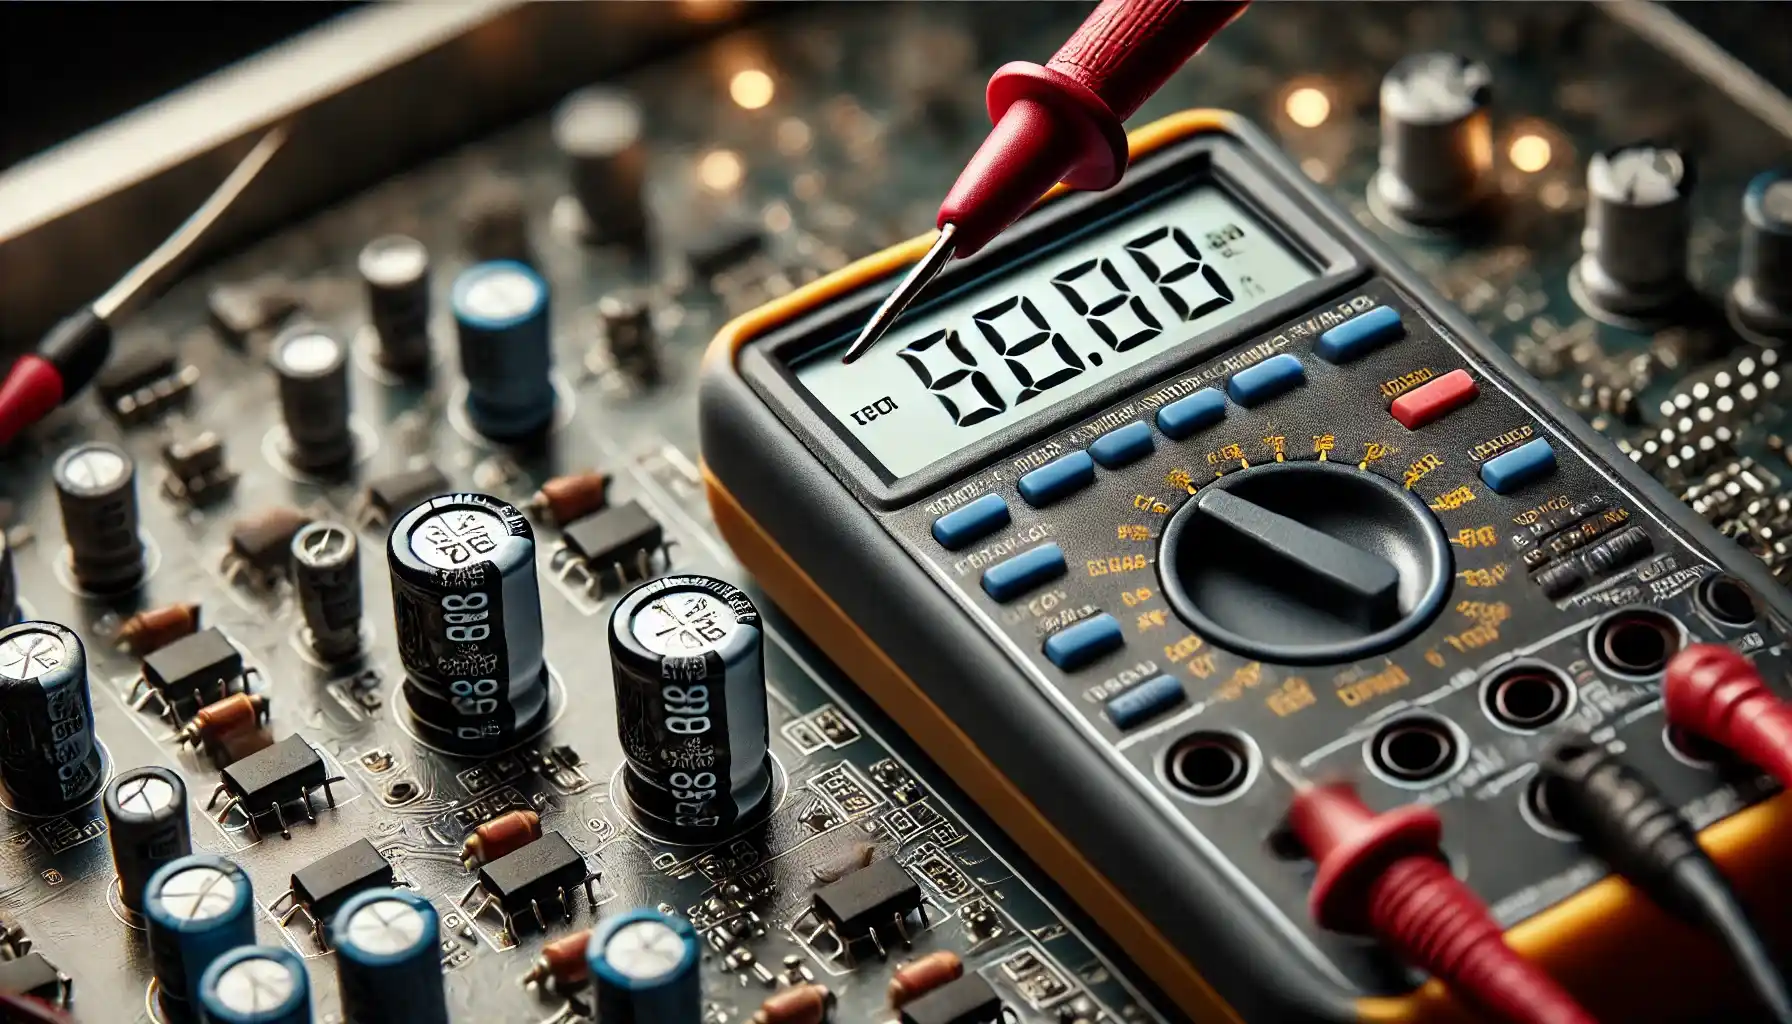
✅ Use the Right Tools – A multimeter is the easiest tool for testing capacitors.
🛠️ Method 1: Testing a Capacitor with a Digital Multimeter (Best for Beginners)
Step 1: Discharge the Capacitor
- If the capacitor was recently used, it may still hold charge.
- To discharge it, connect a resistor (1KΩ – 10KΩ) across the capacitor terminals for a few seconds.
- Alternatively, use a screwdriver with an insulated handle to short the terminals of small capacitors (⚠️ Be careful, this can cause a spark).
Step 2: Set Your Multimeter
- Turn the multimeter dial to capacitance mode (symbol: ⏛) if available.
- If your multimeter doesn’t have this mode, set it to resistance (Ω) mode.
Step 3: Connect the Probes
- For electrolytic capacitors: Connect the red probe to the positive (+) terminal and the black probe to the negative (-) terminal.
- For non-polarized capacitors: Connect probes in any direction.
Step 4: Check the Reading
- If using capacitance mode, the display should show a value close to the capacitor’s rated value (for example, a 100µF capacitor should show around 90-110µF).
- If using resistance mode, a good capacitor will first show low resistance, then slowly increase to infinity (open circuit). A bad capacitor will show either:
- Zero resistance (short circuit) → The capacitor is faulty.
- Fixed low resistance → The capacitor is leaking and should be replaced.
⚡ Method 2: Testing a Capacitor Without a Multimeter
If you don’t have a multimeter, you can still test a capacitor using a simple method.
Using a Power Supply & LED (For Electrolytic Capacitors Only)
1️⃣ Charge the capacitor by connecting it to a low-voltage DC power supply (5V-12V) for a few seconds.
2️⃣ Disconnect the capacitor and immediately touch its leads to an LED (observing polarity).
3️⃣ If the LED flashes briefly, the capacitor is holding charge and working. If the LED doesn’t light up, the capacitor is dead.
🎯 Signs of a Bad Capacitor
🔴 Bulging or Leaking – If the capacitor’s body looks swollen or has leaked fluid, it’s bad.
🔴 Burn Marks – Any sign of burn marks means it’s damaged.
🔴 No Charge Holding – If the capacitor doesn’t store charge, it’s faulty.
🤔 FAQs
Q1: Can I test a capacitor without removing it from the circuit?
✅ Sometimes! If your multimeter has a capacitance mode, you can test it in-circuit. But for accurate results, it’s best to remove it.
Q2: What happens if I use a bad capacitor in a circuit?
🚨 A bad capacitor can cause flickering displays, distorted sound, or complete circuit failure. Always replace faulty capacitors.
Q3: How long does a capacitor last?
⌛ Most capacitors last 5-20 years, but heat and voltage stress can shorten their lifespan.
🔥 Final Thoughts
Testing a capacitor is easy once you understand the basics. Using a multimeter is the best way, but even without one, you can check if a capacitor holds charge. Always remember to stay safe, discharge the capacitor first, and replace faulty ones to keep your circuits running smoothly!
Would you like to try testing a capacitor yourself? Let us know your results in the comments! 👇🔧✨


