🔢 Build a Smart 1-Digit Digital Counter with Raspberry Pi Pico
🎯 Project Goal:
Create a modern 1-digit counter using a 7-segment display, Raspberry Pi Pico, and add smart features like:
- Start & Reset (Home) buttons
- Green & Red LEDs
- Buzzer beep alerts
- Auto-reset when the count ends
📚 What Will You Learn?
✅ How to use a 7-segment display
✅ How to control LEDs and buzzer
✅ How to connect buttons
✅ How to write a smart logic program in MicroPython
🧰 Components Needed
| Component | Quantity | GPIO Pins Used |
|---|---|---|
| Raspberry Pi Pico | 1 | — |
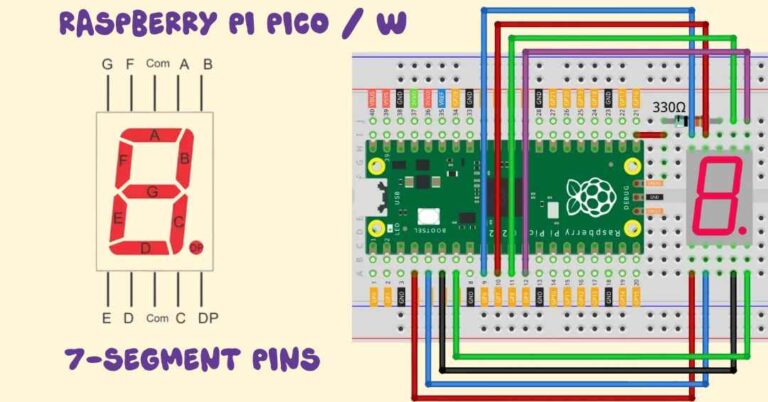
| 7-Segment Display (Common Cathode) | 1 | GPIO 0–7 |
| Push Buttons | 2 | GPIO 10 (Start), GPIO 11 (Home) |
| Green LED | 1 | GPIO 18 |
| Red LED | 1 | GPIO 19 |
| Buzzer (Active or PWM) | 1 | GPIO 15 |
| 220Ω Resistors (for LEDs) | 2 | — |
| Breadboard + Jumper Wires | — | — |
| USB cable + Thonny IDE | 1 | For programming |
🔌 Circuit Diagram Summary
7-Segment Connections (GPIO 0–7)
| Segment | Label | GPIO |
|---|---|---|
| a | A | 0 |
| b | B | 1 |
| c | C | 2 |
| d | D | 3 |
| e | E | 4 |
| f | F | 5 |
| g | G | 6 |
| dp | DP | 7 |
Other Connections
| Device | Connect To |
|---|---|
| Start Button | GPIO 10 + GND |
| Home Button | GPIO 11 + GND |
| Green LED | GPIO 18 (via resistor) + GND |
| Red LED | GPIO 19 (via resistor) + GND |
| Buzzer | GPIO 15 + GND (via resistor optional) |
⚠️ Use Pin.PULL_DOWN in code to ensure buttons are detected correctly.
💻 Full MicroPython Code
Upload this code using Thonny IDE:
from machine import Pin, PWM
import utime

# ----- 7-segment segment pins (a to dp) -----
segment_pins = [0, 1, 2, 3, 4, 5, 6, 7]
segments = [Pin(pin, Pin.OUT) for pin in segment_pins]

# ----- LEDs -----
green_led = Pin(18, Pin.OUT)
red_led = Pin(19, Pin.OUT)

# ----- Buzzer -----
buzzer = PWM(Pin(15))

# ----- Buttons -----
start_button = Pin(10, Pin.IN, Pin.PULL_DOWN)
home_button = Pin(11, Pin.IN, Pin.PULL_DOWN)

# ----- 7-segment digit patterns -----
digit_patterns = [
    (1, 1, 1, 1, 1, 1, 0, 0),  # 0
    (0, 1, 1, 0, 0, 0, 0, 0),  # 1
    (1, 1, 0, 1, 1, 0, 1, 0),  # 2
    (1, 1, 1, 1, 0, 0, 1, 0),  # 3
    (0, 1, 1, 0, 0, 1, 1, 0),  # 4
    (1, 0, 1, 1, 0, 1, 1, 0),  # 5
    (1, 0, 1, 1, 1, 1, 1, 0),  # 6
    (1, 1, 1, 0, 0, 0, 0, 0),  # 7
    (1, 1, 1, 1, 1, 1, 1, 0),  # 8
    (1, 1, 1, 1, 0, 1, 1, 0)   # 9
]

# ----- Function to display a digit -----
def display_number(num):
    pattern = digit_patterns[num]
    for seg, val in zip(segments, pattern):
        seg.value(val)

# ----- Function for short beep-beep -----
def beep_short():
    for _ in range(2):
        buzzer.freq(1200)
        buzzer.duty_u16(30000)
        utime.sleep(0.1)
        buzzer.duty_u16(0)
        utime.sleep(0.1)

# ----- Function for long final beep -----
def beep_long():
    buzzer.freq(800)
    buzzer.duty_u16(40000)
    utime.sleep(3)
    buzzer.duty_u16(0)

# ----- Initialize -----
count = 0
state = "idle"
display_number(count)
green_led.value(0)
red_led.value(0)

# ----- Main loop -----
while True:
    # HOME BUTTON → reset to 0
    if home_button.value() == 1:
        count = 0
        state = "idle"
        display_number(count)
        green_led.value(0)
        red_led.value(0)
        buzzer.duty_u16(0)
        utime.sleep(0.3)  # Debounce

    # START BUTTON → begin counting
    if start_button.value() == 1 and state == "idle":
        state = "counting"
        utime.sleep(0.3)  # Debounce

    # COUNTING STATE
    if state == "counting":
        display_number(count)
        green_led.toggle()
        beep_short()
        utime.sleep(1)
        count += 1
        if count > 9:
            count = 9
            state = "done"
            green_led.value(0)

    # DONE STATE → 3s long beep + red LED + auto reset
    if state == "done":
        red_led.value(1)
        beep_long()
        red_led.value(0)
        count = 0
        display_number(count)
        state = "idle"
🧠 How It Works – Step by Step
- Home State (count = 0)
→ Red & green LEDs are OFF
→ Display shows “0”
→ Waiting for user to press Start - Press Start
→ Starts counting from current number
→ Green LED blinks, buzzer goes beep-beep
→ Increments every 1 second - At Number 9
→ Green LED stops
→ Red LED turns ON
→ Buzzer gives a long 3s beep
→ Automatically resets to Home state - Press Home Anytime
→ Immediately stops counting
→ Display resets to0
→ System waits for Start again
🧠 Code with Line-by-Line Explanation
from machine import Pin, PWM
import utime
✅ Imports Required Modules
machine: Gives access to hardware pins (GPIO).Pin: Used to define input/output pins.PWM: Used to control buzzer sound using pulse-width modulation.utime: Provides delay functions likesleep().
# Segment Pins a to dp
segment_pins = [0, 1, 2, 3, 4, 5, 6, 7]
segments = [Pin(pin, Pin.OUT) for pin in segment_pins]
✅ Defines 7-Segment Display Pins
segment_pins: List of GPIOs connected to segments a to dp (decimal point).segments: Creates a list ofPinobjects set to OUTPUT mode for each segment.
# LEDs
green_led = Pin(18, Pin.OUT)
red_led = Pin(19, Pin.OUT)
✅ Sets Up LEDs
green_led: Blinks during counting.red_led: Turns ON when count reaches 9.
# Buzzer
buzzer = PWM(Pin(15))
✅ Sets Up Buzzer
- Connects PWM (sound signal) to GPIO15.
- This lets you control frequency and duration of beeps.
# Buttons
start_button = Pin(10, Pin.IN, Pin.PULL_DOWN)
home_button = Pin(11, Pin.IN, Pin.PULL_DOWN)
✅ Sets Up Buttons
start_button: Starts the counting process.home_button: Resets counter to 0 and stops everything.Pin.PULL_DOWN: Ensures button reads0until pressed (then becomes1).
# Segment patterns for 0–9
digit_patterns = [
    (1, 1, 1, 1, 1, 1, 0, 0),  # 0
    (0, 1, 1, 0, 0, 0, 0, 0),  # 1
    (1, 1, 0, 1, 1, 0, 1, 0),  # 2
    (1, 1, 1, 1, 0, 0, 1, 0),  # 3
    (0, 1, 1, 0, 0, 1, 1, 0),  # 4
    (1, 0, 1, 1, 0, 1, 1, 0),  # 5
    (1, 0, 1, 1, 1, 1, 1, 0),  # 6
    (1, 1, 1, 0, 0, 0, 0, 0),  # 7
    (1, 1, 1, 1, 1, 1, 1, 0),  # 8
    (1, 1, 1, 1, 0, 1, 1, 0)   # 9
]
✅ Stores Segment Patterns for Each Digit
- Each tuple represents which segments to turn ON (
1) or OFF (0) for numbers0to9. - The order matches GPIO pins 0 to 7 (a to dp).
# Display a digit
def display_number(num):
    pattern = digit_patterns[num]
    for seg, val in zip(segments, pattern):
        seg.value(val)
✅ Displays a Number on the 7-Segment
- Looks up the segment pattern for the given
num. - Sets each segment to ON or OFF using
seg.value(val).
# Short double beep during counting
def beep_short():
    for _ in range(2):
        buzzer.freq(1200)           # Set frequency
        buzzer.duty_u16(30000)      # Set sound volume (duty cycle)
        utime.sleep(0.1)            # Beep for 0.1 seconds
        buzzer.duty_u16(0)          # Stop beep
        utime.sleep(0.1)            # Wait before next beep
✅ Makes “Beep-Beep” Sound While Counting
- Runs 2 short beeps using PWM frequency and duty cycle.
# Long beep when count ends
def beep_long():
    buzzer.freq(800)                # Lower frequency for final beep
    buzzer.duty_u16(40000)          # Louder sound
    utime.sleep(3)                  # Hold for 3 seconds
    buzzer.duty_u16(0)              # Turn off buzzer
✅ Final Long Beep When Count Ends at 9
- Buzzer gives a continuous beep for 3 seconds.
# Initial state
count = 0
state = "idle"
display_number(count)
✅ Sets Up Initial State
count = 0: Starting number.state = "idle": System is waiting for the start button.display_number(count): Show0on the display.
# Main loop
while True:
✅ Infinite Loop Keeps Running the Program
- Continuously checks button inputs and updates the system.
if home_button.value() == 1:
        count = 0
        state = "idle"
        display_number(count)
        green_led.value(0)
        red_led.value(0)
        buzzer.duty_u16(0)
        utime.sleep(0.3)
✅ Home Button Logic
- Resets everything to the home state.
- Green & red LEDs OFF, buzzer OFF, display reset to
0.
   if start_button.value() == 1 and state == "idle":
        state = "counting"
        utime.sleep(0.3)
✅ Start Button Logic
- When pressed, changes state to
"counting"to begin counting. - Debounce delay avoids double-press detection.
if state == "counting":
        display_number(count)
        green_led.toggle()
        beep_short()
        utime.sleep(1)
        count += 1
        if count > 9:
            count = 9
            state = "done"
            green_led.value(0)
✅ Counting Logic
- Displays current number.
- Blinks green LED and beeps during counting.
- After each second, increases count.
- If
countexceeds 9, stop counting and switch to"done"state.
 if state == "done":
        red_led.value(1)
        beep_long()
        red_led.value(0)
        count = 0
        display_number(count)
        state = "idle"
✅ When Count Reaches 9
- Red LED turns ON.
- Long 3-second beep is played.
- System auto-resets to 0 and returns to idle state.
🎓 Wrap-Up
With this explanation, even first-time coders or school students can:
✅ Understand how microcontrollers interact with displays, buttons, and sensors
✅ Build structured logic using states (idle, counting, done)
✅ Use sound and light feedback in real projects
🧪 Try This!
- Change the delay to 0.5s for faster counting.
- Add a second 7-segment display to show 2 digits.
- Try displaying countdown (from 9 to 0).
- Replace buzzer with speaker for different tones.
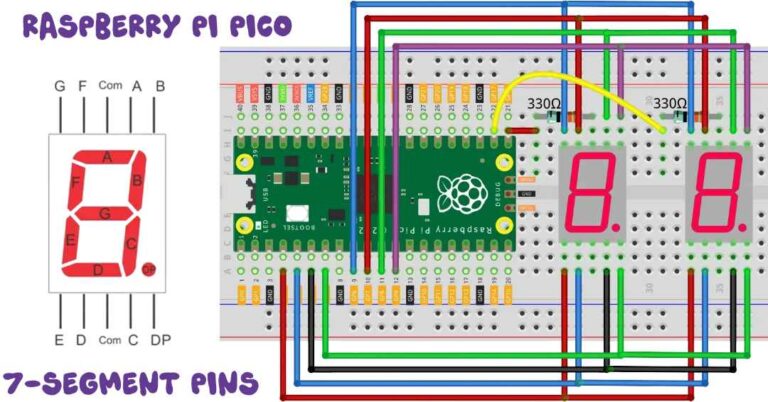
📷 Project Snapshot
(You can add a labeled breadboard image here showing connections.)
📘 Summary
You just built a smart digital counter with:
✅ Visual Display
✅ Audio Feedback
✅ State-based logic (Start, Stop, Auto-reset)
✅ Button interaction
✅ Beginner-friendly MicroPython logic
🔚 What’s Next?
- Use a Pico W to control it from your phone
- Display the count on an OLED screen
- Use this system as a timer, voting machine, or event counter