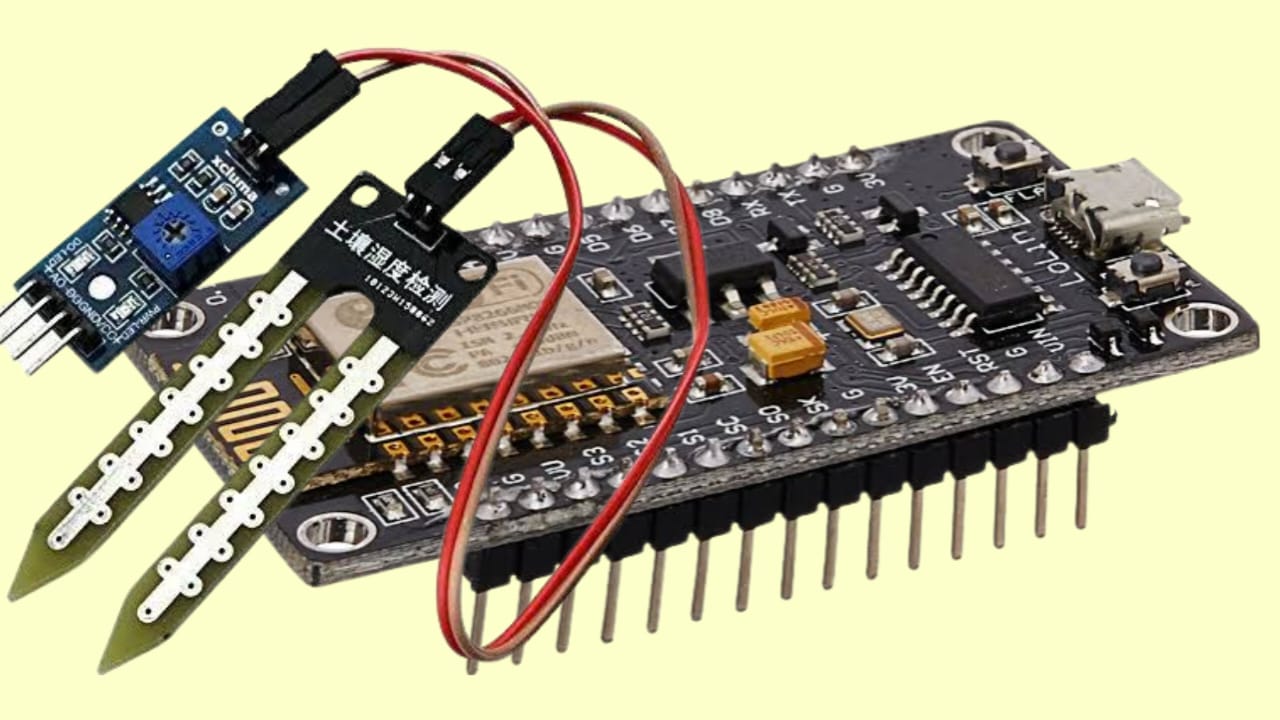
Soil Moisture Sensor I soil hygrometer sensor or soil moisture meter with ESP8266 NodeMCU: Sensor Pinout, Connections, Codes, Practical Project
Soil moisture sensors or Soil moisture Meter are valuable tools for gardeners, farmers, and hobbyists who want to monitor soil moisture levels to optimize watering schedules or build smart irrigation systems. Pairing a soil moisture sensor with an ESP8266 NodeMCU can create a low-cost and effective solution for smart gardening projects. In this article, we’ll explore the pinout, connections, coding, and a practical project using these components. Let’s dive in!
What is a Soil Moisture Sensor?
A soil moisture sensor measures the water content in the soil. The sensor typically has two probes that act as a variable resistor. When inserted into the soil, it outputs an analog signal proportional to the moisture level:
- Dry Soil: Higher resistance and lower analog value.
- Wet Soil: Lower resistance and higher analog value.
The sensor generally includes:
- Probes: Detect soil moisture.
- Amplifier Module: Converts the raw signal into a readable format (analog or digital output).
Understanding the Soil Moisture Sensor Pinout
Most soil moisture sensors come with two parts: the sensor probes and the amplifier module. The amplifier module has the following pins:
- VCC: Power supply (3.3V or 5V).
- GND: Ground.
- AO (Analog Output): Outputs analog voltage based on soil moisture levels.
- DO (Digital Output): Outputs a HIGH or LOW signal based on a threshold set by the onboard potentiometer.
Why Use ESP8266 NodeMCU?
The ESP8266 NodeMCU is a versatile microcontroller with built-in Wi-Fi, making it ideal for IoT projects. It allows you to:
- Monitor soil moisture remotely.
- Integrate with platforms like Blynk, Adafruit IO, or ThingSpeak.
- Automate irrigation systems.
Key Features of NodeMCU:
- Operating Voltage: 3.3V
- Analog Pin: 1 (ADC0)
- Digital Pins: Multiple GPIOs for various peripherals
- Wi-Fi Support: For remote monitoring
Wiring the Soil Moisture Sensor with ESP8266 NodeMCU
Here’s how to connect the sensor to your NodeMCU:
Components Required:
- ESP8266 NodeMCU
- Soil Moisture Sensor with amplifier module
- Jumper wires
- Breadboard
Connection Diagram:
| Soil Moisture Sensor | NodeMCU |
|---|---|
| VCC | 3.3V |
| GND | GND |
| AO | A0 |
Coding for Soil Moisture Monitoring
Let’s write a program to read the analog output of the sensor and display the moisture level on the Serial Monitor.
Arduino Code:
#define SENSOR_PIN A0 // Analog pin connected to soil sensor

void setup() {
  Serial.begin(9600); // Start Serial communication
}

void loop() {
  int sensorValue = analogRead(SENSOR_PIN); // Read analog value
  float moisturePercentage = map(sensorValue, 1023, 0, 0, 100); // Convert to percentage

  Serial.print("Soil Moisture: ");
  Serial.print(moisturePercentage);
  Serial.println("%");

  delay(1000); // Wait for a second
}
Explanation:
analogRead(SENSOR_PIN):Reads the sensor’s analog value.map():Converts the analog value to a percentage.Serial.print():Displays the moisture level.
/


