DIY Ice Cloud Fun Science Experiment for School Projects : Discover the Science Behind Cloudy Ice
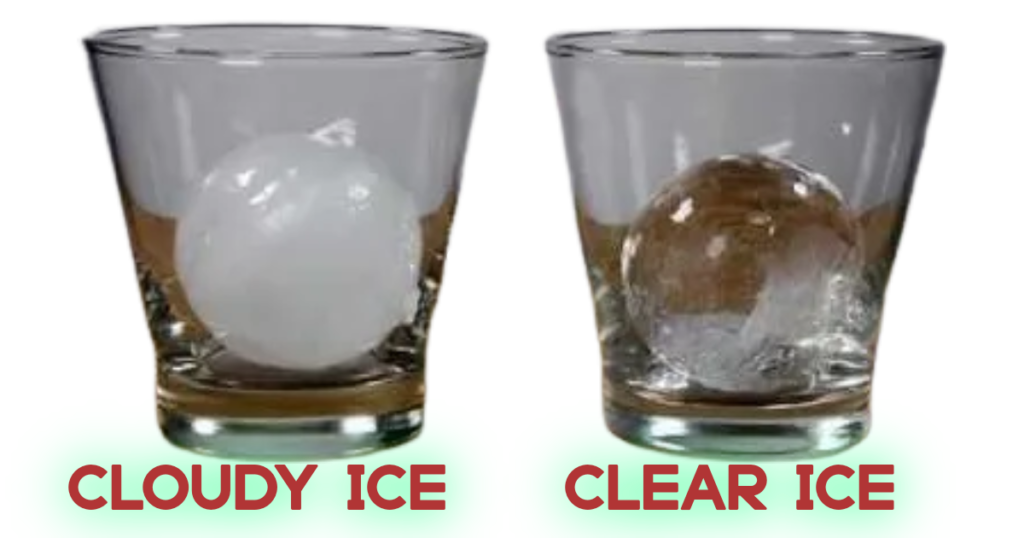
Ice clouds (cloudy ice) are a fascinating phenomenon that occur when air is trapped in ice, making it look cloudy. This simple science project will help you understand how air gets mixed into water and how it affects the appearance of ice. By following these steps, you will create two different types of ice—one that is clear and one that is cloudy.

Materials Needed
- Two plastic food containers with lids
- Water
- Kettle
- Freezer
Instructions
Step 1: Prepare the Cold Water
- Fill the First Container with Cold Water:
- Half-fill the first plastic food container with cold tap water.
- Snap on the lid tightly.
- Shake to Mix Air:
- Shake the container vigorously for 30 seconds. This helps mix air into the water, which will later form bubbles in the ice.
Step 2: Prepare the Hot Water
- Boil Water:
- Boil some water using a kettle and let it cool for a few minutes. Boiling water helps remove some of the dissolved air.
- Fill the Second Container:
- Pour the cooled, boiled water slowly down the side of the second plastic container. Pouring slowly helps reduce the amount of air mixed into the water.
Step 3: Label and Freeze
- Label the Containers:
- Clearly label the containers so you know which one contains the shaken cold water and which one contains the cooled boiled water.
- Freeze Overnight:
- Place both containers in the freezer and leave them overnight to freeze solid.
Step 4: Observe the Results
- Remove the Ice:
- The next day, take both containers out of the freezer.
- Carefully remove the ice from the containers.
- Compare the Ice:
- Examine the ice made from the shaken water. You will notice it contains lots of tiny bubbles, making it look cloudy.
- Look at the ice made from the boiled water. It should be clearer since it contains less air.
Explanation: how does this work?
When you shake the cold tap water, air gets dissolved in it. As the water freezes, the air forms bubbles inside the ice, creating a cloudy appearance. On the other hand, boiling water removes some of the dissolved air. When this water is cooled and frozen, fewer air bubbles form, resulting in clearer ice.
Conclusion
This project demonstrates how the presence of air in water can affect the appearance of ice. It’s a simple yet fascinating way to explore the science behind ice clouds. Try experimenting with different temperatures and shaking durations to see how they impact the cloudiness of the ice!


